Attend an upcoming “Looking For Leaks” webinar for a free toilet “Fix It” kit!
…or take our free, online class at your own pace.
Toilet Leaks Waste Water Fast
Did you know that the average leaky toilet can waste up to 200 gallons per day? That is the equivalent of five whole bathtubs. If you were to leave that leaky toilet alone for six months, that would be enough water to fill your entire swimming pool. It is important to find and fix these toilet leaks fast, lest they lead to a high water bill and more water lost through salty tears of regret…

What You’ll Need
To test and fix your toilet for leaks, you will need:
- Leak detection tablet or food dye
- Toilet flapper
- Measuring tape (to measure your current flapper)
- Gloves (optional)
Testing Your Toilet
You might be hearing that trademark “running” noise when your toilet is not in use. That is certainly a telltale sign of a leaky toilet. However, if you aren’t certain, or you just want to confirm visually, you can conduct a leak detection test.

To test your toilet, do the following:
- Open up your toilet tank.
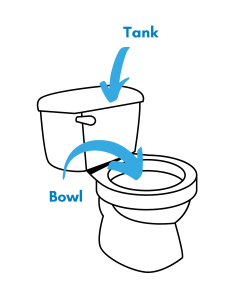
- Add a dye tablet or a few drops of food coloring to the water in your tank.
- Wait 30 minutes without using the toilet.
- Check the bowl to see if there is any color.
- If there is, then you have a leak!
How to Fix It
- Turn off the water flow to your toilet by turning the valve behind your toilet clockwise.
- Flush the water out of the tank until it’s empty.
- Remove the old flapper by taking it off the pegs on both sides of the flush valve and disconnecting the chain.
- Measure your old flapper to make sure your new flapper is the same size.
- Take your replacement flapper and connect it to the pegs on both sides of the flush valve.
- Reconnect the chain to the flush lever.
- Test the seal by pressing down on the handle. Readjust the connection to the chain as needed.
- If everything looks good, turn on your water flow by turning the valve behind your toilet counterclockwise.
- Wait until the water fills back up to do a final flush test.
- You did it! Hurray!
Note: If the running water sound is still there, you may need to replace the flush valve or have a professional come take a look at your plumbing.
Watch the tutorial below to see the process in action.
Resources
- Water Conservation website
- Water Wednesday Recap – All About Your Toilet blog
- Early leak detection saves water and money blog
 1
1
