When working with a UF/IFAS Communications graphic designer, they’ll finish a draft, and they’ll upload it to PageProof, a web‑based proof viewer. You’ll receive an email with a link to VIEW PROOF.

After reviewing your document, the easiest way to share feedback is by leaving comments.
Ways to Leave a Comment
To leave a comment, you can either reply to a current comment or add a new comment.
- Reply – If you are directly responding to a comment left by someone else, click the “Reply…” link in the bottom right corner of the comment box. You will not be able to leave a markup on the proof when replying directly to another comment, but you can attach a file to the reply if needed.
- New Comment – Select the top icon in the left‑hand menu to open the commenting tools. There are 4 categories of comments you can leave.

- The general comment lets you create a comment without markup on the proof.
- The standard pen (also known as the Red Pen) can draw a pin, line, or box.
- The drawing pen lets you leave freehand markups on the proof.
- The highlighter pen lets you select text on the proof. This text will get copied to the comment where you can edit or style it (bold, italics, strikethrough, underline etc).

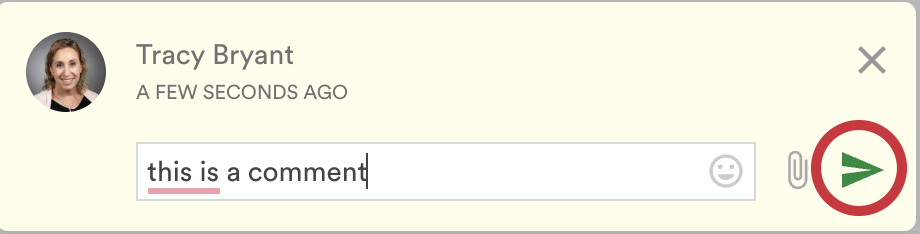
- To submit your comment, click on the green paper plane icon.
Approving a Proof
Every person is assigned a role depending on the situation. You’ll either be an approver, who makes the final decision on proof, or a reviewer, who is there to give additional input.
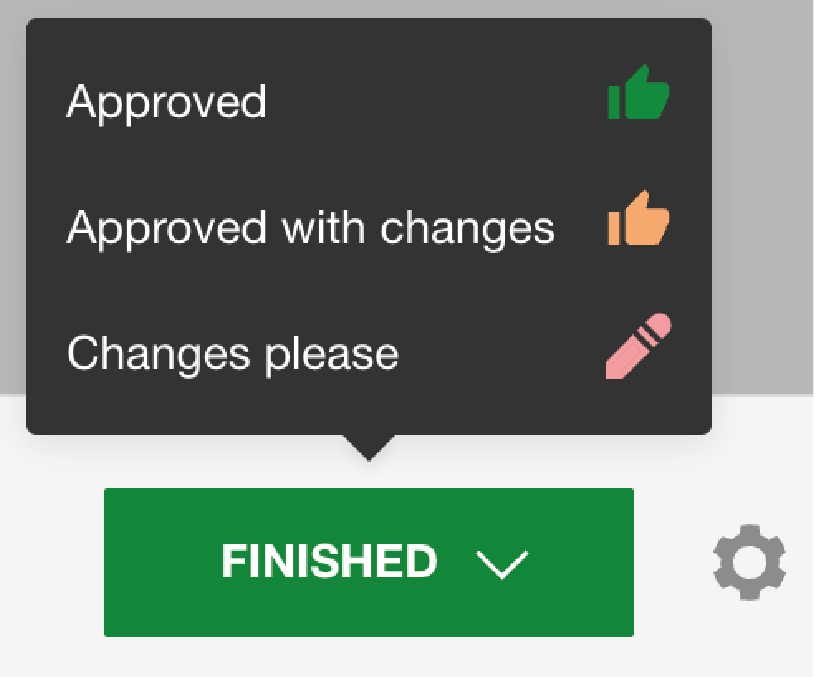
If you are a Reviewer, you’ll see a green FINISHED button. You will have the option to choose Approved, Approved with changes, or Changes please.
- Approved means you don’t need to see it again.
- Approved with Changes means you’ve suggested a change but trust it to be made without seeing the proof again. Only choose this option if there are minimal requested changes.
- Changes please means you need to see a new version of the design.
If you are an Approver, you’ll see one of two options:
SEND TO-DO LIST means you are requesting the designer to make edits. You can add or remove red checks by clicking on them and choosing a new option from the dropdown.
APPROVE means you approve the proof without any additional changes needed. This will also lock the proof to further comments. If you approve by accident, your designer can unlock it.

Tips & Tricks
- Explore the tools — Click around to see what each menu item does. You can always delete a comment if needed.
- Tag people — Use @ to mention someone directly.
- Ask for a walkthrough — Your designer is happy to share their screen if you’d like help.
Learn more
PageProof’s help articles and YouTube videos offer quick guides and short demos:
- A quick guide to online reviewing with PageProof — youtube.com/watch?v=LVoGLm6rdWE
- Adding Comments — help.pageproof.com/en/articles/365376-adding-a-comment
- Approval Options — help.pageproof.com/en/articles/6477013-reviewer-decisions-approved-with-changes
- Returning a To‑Do List — help.pageproof.com/en/articles/64815-returning-a-to-do-list
 0
0