Congratulations, EDIS author! You have made it to the production stage of publishing with the EDIS journal. Your EDIS editor just sent you the PDF version of your work. What do you do now? They asked you to review the proof edits and make any additional changes. How do you do that? Technology can often become an obstacle for clear communication. Please read on to ensure you navigate this stage smoothly. Using Adobe Acrobat is the best way to communicate changes to your EDIS editor during the production stage. It allows you to read comments left by the proofreader and your editor, as well as see where and what kind of edits appear on the PDF.

Get the Lay of the Land
First, open the PDF in Adobe Acrobat. Draw your attention to the tabs on the top of the left-side panel: “All Tools,” “Edit,” “Convert,” and “Sign.” Each tab conjures a list of functions for changing a PDF in the panel below. Avoid pressing the “Edit” tab. Understandably, your first instinct may be to press this button to add your own edits. However, this tab allows the user to make changes directly on the text. Your editorial team will not be able to see what changes you want made, and the layout can change incorrectly. Make sure to select “All Tools” when you add changes to the pdf.
Tool Bar
To best communicate changes using Adobe Acrobat to your editor, you must use the right tools. No matter what tab you select, the tool bar will remain in place. It usually resides to the right of the panel described above, but you can move it to the most convenient location by clicking and dragging the gray horizontal line at the top of the bar. The icon functions and order can be modified, and each tell you about their function upon selection. To make markup changes with any tool, first select the tool then apply it to the document.
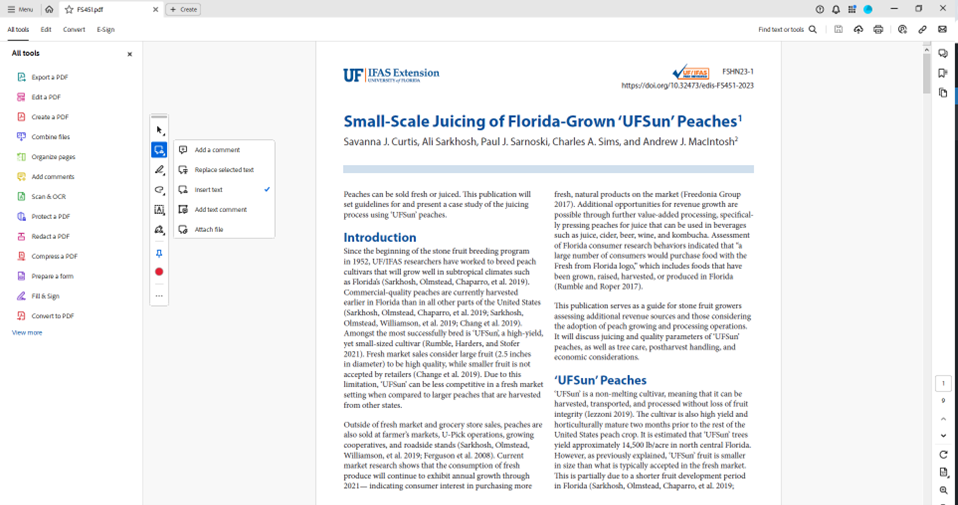
For example, select the message bubble icon. Then choose “Insert Text.” Use your cursor to left-click anywhere on the text of the document. A comment box will open; begin typing your change. Notice that this markup will not directly change the text of the document; it will instead instruct the user to implement a specific change according to the comment. Therefore, using “Insert Text” will create a comment box that reads “Insert Text,” followed by what words or letters should be inserted. You can customize your tool bar by pressing the three dots at the bottom, then “customize.”
So Many Icons! Here Are Ways to Communicate Changes without the Tool Bar
My favorite feature on Acrobat is the list of options that appear when you right-click on text. First, I will left-click where I want my text cursor (or caret) to insert text, or I will left-click while dragging and selecting a string of text. Then right-click that cursor location or text selection. Your list of options will appear.
When right-clicking at a cursor location, pay attention to two notably helpful options in the list:
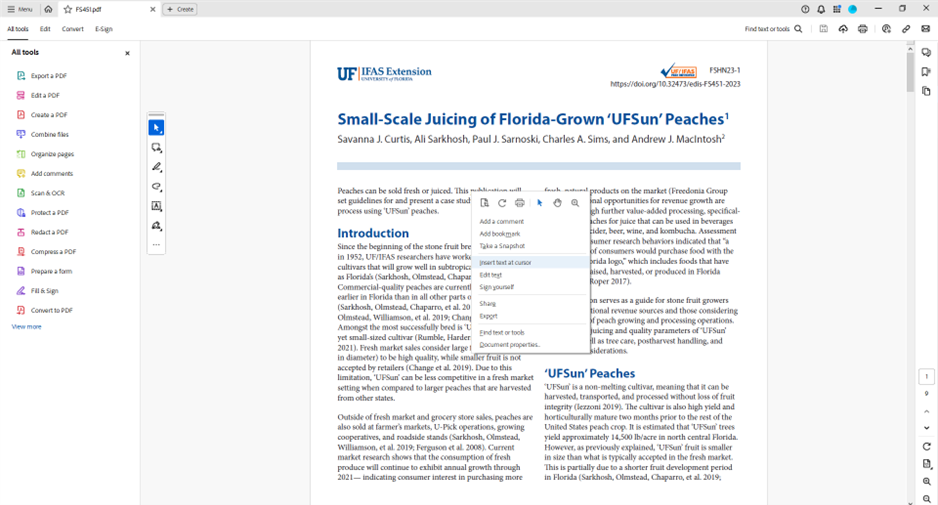
- “Add a Comment.”
- This option will make a post-it note on the pdf, which you are able to move or change color. Then, you can write a comment. This function is best for placing a note on figures, tables, or any other large object—any change that cannot be summed by a selection of words.
- “Insert Text at Cursor.”
- Use this option to indicate that additional text is needed at that location, usually between words or letters.
When right-clicking a text selection, these helpful options are among those which will appear:
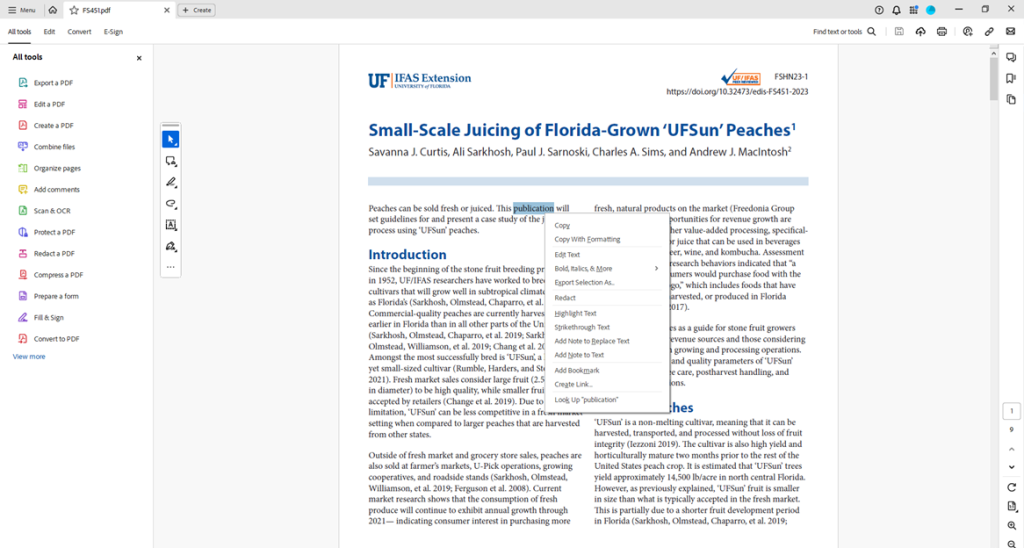
- “Copy”
- This option is just like any other “copy” function, but sometimes it takes a couple extra seconds to store that information. You will know it is ready for pasting when the “timer” icon on your cursor disappears.
- “Copy with Formatting”
- See above comment. This copy will keep any formatting attached to the text selection, such as italics, when you paste it later.
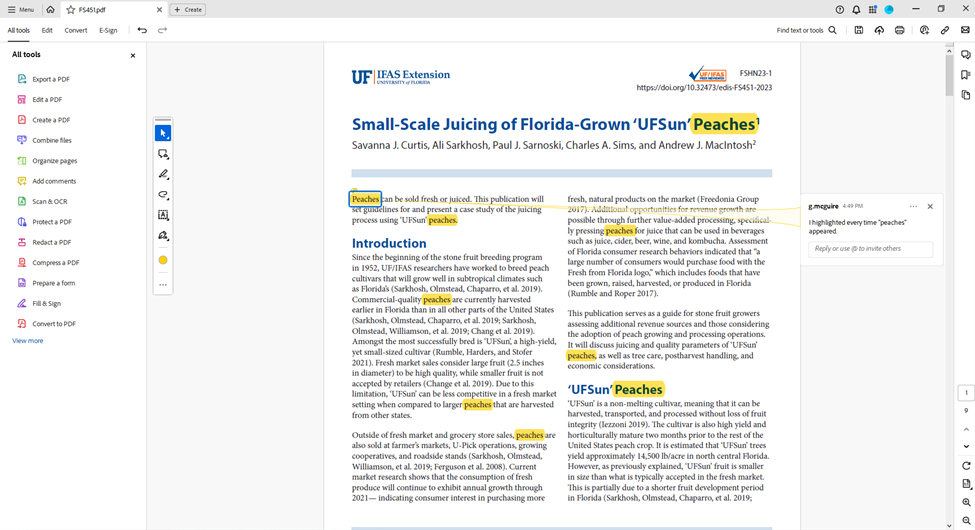
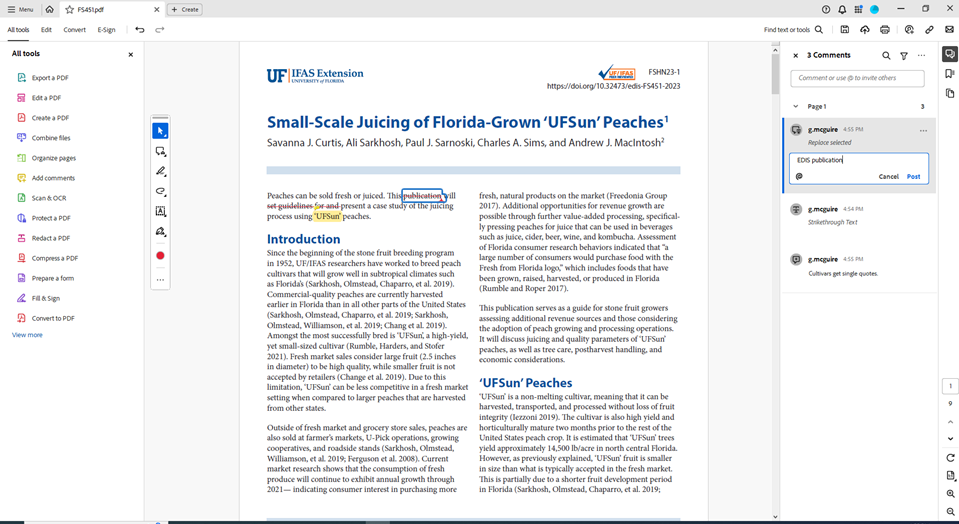
- “Highlight Text”
- This option is very similar to the “Add Note to Text” option. The difference is this one labels the comment box with “Highlighted Text.” This can be useful for highlighting multiple things but using only one comment box to address them all.

Here I chose the “Highlight Text” tool option. If I wanted to address a repetitive problem on a page, I could write a comment addressing multiple highlights, then I could use the highlight tool again on other selections. I also use this tool generally to draw attention to an issue regarding style, such as requesting to make a word italicized. Credit: Adobe product screenshot(s) reprinted with permission from Adobe.
- This option is very similar to the “Add Note to Text” option. The difference is this one labels the comment box with “Highlighted Text.” This can be useful for highlighting multiple things but using only one comment box to address them all.
- “Strikethrough Text”
- Using this option will indicate that you want to delete the selected text, and a line will cross out those words. Optionally, you can write in the comment box any clarifying information about the deletion.
- “Add Note to Replace Text”
- Use this option to delete and then replace selected words. A line will cross out those words, similarly to the “strikethrough” option. Then when the comment box appears, you should write the replacement word(s). Notice that the comment will direct users to “Replace Selected.”
- “Add Note to Text”
- This option has nearly the same function as the “Highlight Text” option, but this one does not direct users to “Highlighted Text.” I find this option very useful for making a note about specific text, especially if the change pertains to style. For example, you may want to call attention to text that is missing the hyperlink style or missing italics. You can write about the necessary change in the comment box.
Where to Find Your Comments
Viewing all the comments is key to communicating changes well on Adobe Acrobat. There are a few ways to see the comments you make. When you make a change and create a comment, a box will open next to the document. It will say your screenname and a place to type the comment. After typing your comment, push “post.” You can also push “cancel” or “X” if you do not want to keep that comment. When creating the comment, a semi-permanent red line will connect your comment to its location within the document. Once you post the comment, you can click on the markup to view the comment box; the connecting line will this time appear as whatever color you chose for that comment or as the default color. You can reply to comments underneath your message.
You can also see the collection of comments in the comments panel. Open the panel by selecting the three dots on a comment and pressing “Open comment panel.” You can also open the panel by pressing the message bubble icon on the top right side of Acrobat (two icons below the Windows close-out button). All the comments will appear together in this side panel. By selecting a comment, a blue-outlined box will draw your attention to the location of the markup on the document.
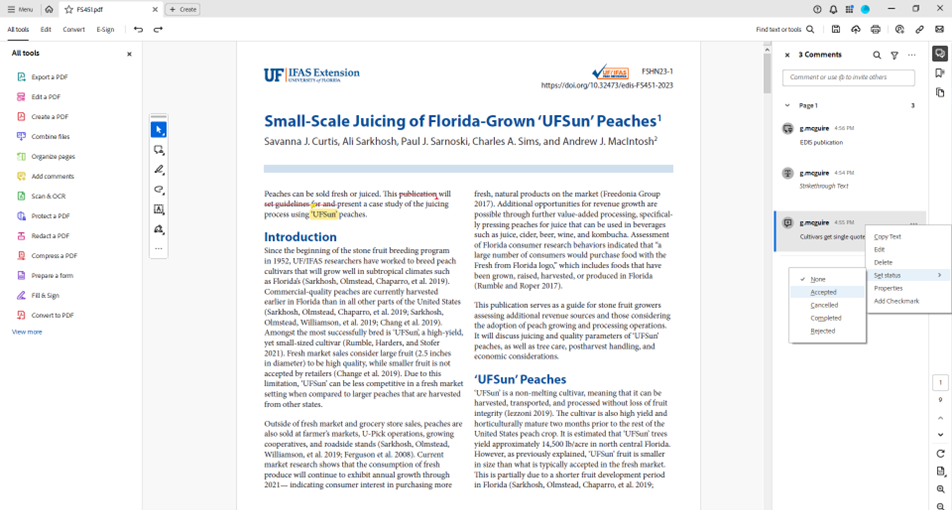
On every comment box, you will find three dots in the right corner. Choose the “Edit” option to edit any message on your comments. Press “Delete” to remove a comment. Lastly, “Select Status” allows you to accept, reject, or cancel a comment. Feel free to use this to let your editor know your thoughts about a change. Of course, merely replying to a comment is a feasible option, too.
Final Tips
When you click on the markup of your document, a bubble will pop up with three icons: a message bubble with a plus, a colored stop sign, and a trash can. You can use these to add a new comment for the same markup, change the color of your markup or note, and delete the markup. Never delete a comment from your editor or proofreader. The editorial team needs to keep track of approved and rejected changes. Instead change the status or reply with your thoughts.
Before You Finish
Do not forget to hit save! Push the floppy-disk icon at the top right of Acrobat (above the comments panel). Then send the document back to your EDIS editor. Our team will take care of the corrections. Be on the look out for another message from us, so we can deliver the clean version to you. You are on your way to publishing with the EDIS journal and on Ask IFAS!
Conclusion
There are numerous functions on Adobe Acrobat, used for more than to communicate changes. These tips are things I use on a daily basis as an EDIS editor, and I discover unrealized features frequently. There is an Adobe Acrobat plugin for Google Chrome now, which has all the same features but may be laid out differently. This blog is specifically discussing the application.
You can always visit the Adobe Acrobat Learn & Support page at https://helpx.adobe.com/support/acrobat.html for tutorials and guidance if you are still stuck on using either application or plugin. Also, feel free to ask your EDIS editor for guidance. We are here to support you.
Check out other informational posts for authors on the EDIS blog, like this one about using the EDIS template for submissions: https://blogs.ifas.ufl.edu/edis/2021/08/18/the-edis-template-a-primer/.
 0
0
