Google Sheets is an online tool available to anyone with access to the internet and a major life skill as well! It is essentially the equivalent of Microsoft Excel and you can use it to create artwork by modifying the cells in the sheet to change colors. There are a few steps you need to use in being able to create a piece of pixel art. To start this whole process, you’ll visit sheets.google.com. If you have a Google account, login. Select, “Blank” to start a new spreadsheet.
Resize Columns
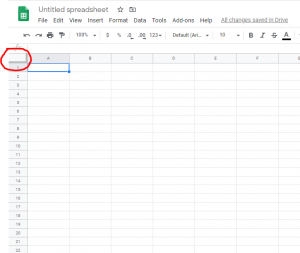
 First, you’ll need to resize all your cells to squares, not rectangles. You can resize the columns by highlighting the columns and dragging the sides inward. To highlight an entire column, click the letter at the top. Move your cursor to the right until an arrow shows and then click to drag it to the left. You could do each one individually or instead, click the blank square in the top left corner and it highlight all squares allowing for you to simply drag only one and all of the columns change in response to that.
Insert Columns
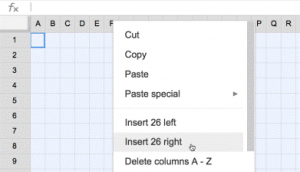
 While you have all the cells highlighted, simply right click and select “copy.” Next, go to the last cell, click and select “paste.” This will insert the same number of columns that you had highlighted and will expand your pixel art area.
Paint Can
 Using the paint can in the toolbar, click on a cell and fill the cell with a color. If you wish, you can fill a cell with color and then go back and click on the paint can. Now you can select “custom” and it allows you to fine tune the fill color.
Conditional Formatting
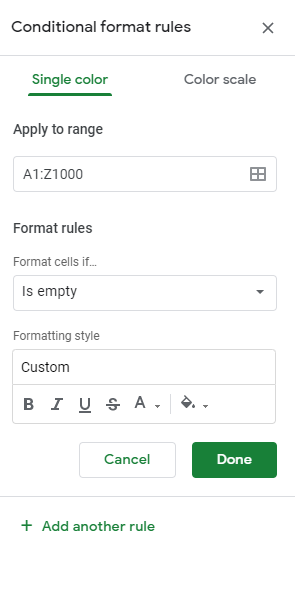
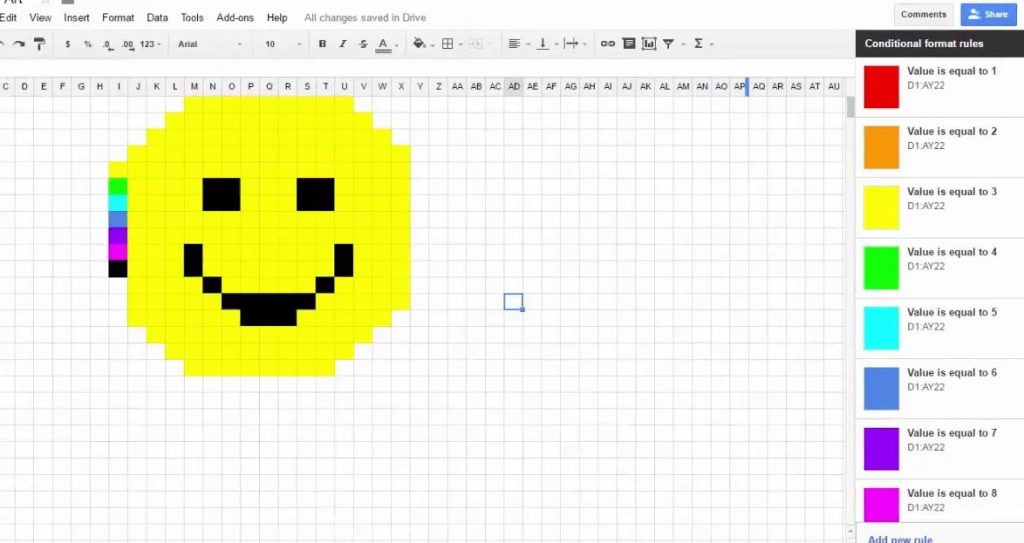
 This is where it gets interesting. Have you ever done paint by numbers? Well, by making cells have conditional formatting, that’s basically what you will be doing. You’ll input a number or letter and the cell will fill with the color you connect to that letter or number. Start by clicking in the box in the top left-hand corner that highlights all the cells. Next, right click in the spreadsheet anywhere and select “Conditional formatting.” A side bar will now pop up to the right of your spreadsheet. This sidebar will allow you to define the rules for formatting. The range should read A1:Z1000. By reading this, it means that you are applying this formatting to all 1000 rows of your spreadsheet. Next, under Format rules, select the arrow down next to “Is empty” and choose “Is equal to.” In the next box, “Value or formula,” insert the number or letter you wish to use. Afterwards, go down to formatting style and select the paint can and the color you wish to use. Click “Done.” To add another color, look further down the side bar and select “+ Add another rule.” Continue repeating this process until you have added all the colors you wish to use in your pixel art.
Using the spreadsheet
Now, all you have left to do is close the Conditional format rules side bar and go back to your spreadsheet. Experiment by adding in letters or numbers and try to create shapes and pictures using the colors you input. People get seriously creative with their pixel art and have been known to produce absolute works of art. Are you ready to get that skilled?

Try out the conditional formatting by creating your own work of art. Share what you’ve done in the comments! Download Pixel Art with Google Sheets Fact Sheet.
 1
1
