The Importance of Soil Testing
Soil testing is one of the most cost effective and important tools that any land managers have at their disposal. The results of a soil test will tell you what the pH of your soil is. If your soil is too acidic (the pH is low), the test results will indicate how much lime you need to add to raise the pH to the ideal range for the forage you are growing. If your soil is too alkaline (too high) you may need to consider selecting an alternative forage that will be more tolerant of higher pH soils. Soil test results can also provide recommendations for how much nitrogen, potassium, and phosphorous (in the form of fertilizer) your pasture forage needs based on what is already present in the soil and/or plant tissue (or, in the case of nitrogen, what research tells us about the needs of the plant). Without soil testing you run the risk of providing too few nutrients for your forages (under fertilizing) which may negatively impact your yields or over fertilizing which represents both economic and environmental concerns. There is no way to tell what your pastures need, in terms of fertilizer or lime, without a soil test.
Developing a Sampling Plan
The first step to obtaining a soil test is to develop a sampling plan for your property. Each soil sample that you will submit to the lab can represent an area of up to twenty acres but the sampling area that it represents should be homogenous. This means that each sampling area should be of similar soil type, elevation, use, and have a similar cropping history. Decide how many sampling areas you have on your property, label, and record them in a way that makes sense to you and will be easy to remember.
As an example, imagine you have twenty acres of Bahia pasture that you are using to graze horses. Ten acres are high and dry with very deep sand and the remaining ten acres are more low lying with higher organic matter soil. You would want to consider these two ten acres as separate sampling areas because they have different soil types and different elevations. You might label one as “high” and the other as “low”.
Pulling and Preparing Samples
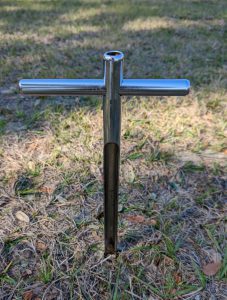
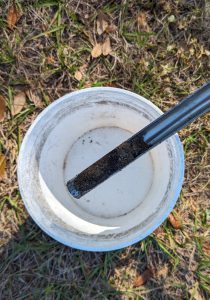
Once you have your sampling plan you can start pulling your soil samples. You’ll want to randomly walk through your sampling area, stopping in approximately 20 locations to pull samples. Make sure that the spot you are pulling a sample from is truly representative of the entire area and not an outlier (avoid areas with manure, urine, ant hills etc.). Pull soil from the surface to 4 inches of depth using a soil probe or hand trowel and put the soil in a clean plastic bucket. Once you have pulled from at least 20 spots, mix the soil in your bucket and check to see if it is dry. If the soil is moist, you can spread it out on clean paper to air dry, otherwise you can go ahead and prepare you sample by removing a pint of soil from the bucket and placing it in a small brown paper bag (official soil sampling bags are available for free at your local county Extension office). Make sure the bag is labeled with the name of the sampling area, your name, and the name of the crop you are growing and that your labels all match what is used on the submission form.


Sending in Your Sample
Soil submission forms can be found online or picked up at your local Extension Office. For Bahia grass use this form us the Bahia Producer Form. for all other pasture grasses including Bermuda use the Producer Soil Test. All tests can be found online at Extension Soil Testing Laboratory – Soil Testing Services – University of Florida, Institute of Food and Agricultural Sciences – UF/IFAS (ufl.edu)
For help filling out the form please see this blog https://blogs.ifas.ufl.edu/lakeco/2023/01/20/soil-testing-pastures-how-to-fill-out-a-soil-submission-form/ You will send the completed form, a check payable to the University of Florida for the total amount due, and your bags of soil to the address listed on the top right of the soil submission form. Once your results arrive you can reach out to your local Extension agent for help understanding them. Results, with recommendations, will be sent to you and your county Extension agent via email (if you provided one on the submission form) or by post in about 5-10 days after the sample arrives at the lab.
 0
0
