Introduction
CSS – Cascading Style Sheets – allow the styling of a webpage to be separate from the HTML code. This also makes changing the look of a website easier because any change in the style sheet is reflected on all web pages using it automatically.
Creating a Border with CSS
There are two ways to create a border effect with CSS
- Use the border property to generate borders with a specific color, width and type (dashed, dotted, solid etc)
- The second method is to use a background image. Why you might use this method will be covered later.
The CSS Border Property
A border will often be added to a div (an html container for content) so that all of the content inside is surrounded by the border. For this example we will have a div in an html page that looks like this:
Code View:
<div><p>This is some text inside my div.</p></div>
What you see is what you get editor (WYSIWYG): (this may also show dotted lines around the edges to show where the container div ends)
This is some text inside my div.
To allow the css (style sheet) to apply to the specific div we have to identify the div with a name. If the div will only be use once on a page, it will be given an ID. If it might be used multiple times on a page it must be a CLASS. For this example a class will be used and the div will be named “alert box”. We cannot have any spaces when using class or ID names so this will become “alert-box”.
<div class=”alert-box”><p>This is a paragraph inside my div.</p></div>
Adding the Border
Since this is an alert box, a two pixel red border will be added around it.
This can be written in the css file 3 different ways!
Written the Loooong Way:
border-top-width:2px;
border-top-style:solid;
border-top-color: #cc0000;
border-right-width:2px;
border-right-style:solid;
border-right-color: #cc0000;
border-bottom-width:2px;
border-bottom-style:solid;
border-bottom-color: #cc0000;
border-left-width:2px;
border-left-style:solid;
border-left-color: #cc0000;
}
The above is the longest and most time consuming method and while it is technically correct, it is not necessary.
A Better, Shorter Way:
With this syntax different border lines can have different colors, thicknesses or styles but it is a much shorter and neater way to write the declaration.
.alert-box {
border-top: 2px solid #cc0000;
border-right: 2px solid #cc0000;
border-bottom: 2px solid #cc0000;
border-left: 2px solid #cc0000;
}
If this is broken down into parts:
“2px” is the border width
“solid” is the style type of border we want to show (solid dotted, dashed etc)
“#cc0000” – hex color which is a red color in this case.
The BEST Way
Because this border is going to be the same width, the same style type and the same color on all sides, this can even be shortened more to:
border:2px solid #cc0000;
}
And that Is IT
With any of the code above you would now have a div that looks like this when viewed in a browser or in a WYSIWYG web editor.
This is some text inside my div.
A background color could be added to the above css declaration by adding:
background-color:#f6f7ca;
or some space on the left:
padding-left:10px;
A Background Image for Border:
Why use a background image for a border when the border syntax above works perfectly well? Well…sometimes it doesn’t.
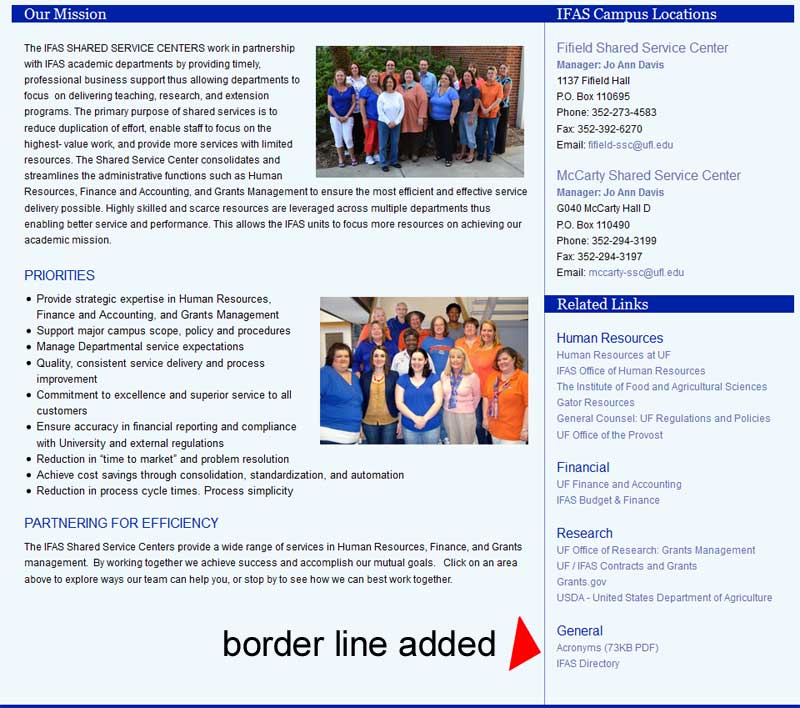
In the UF/IFAS Shared Services Site There were two divs. We wanted a border to be going down the page all the way to the bottom. We could just add the border to the left or right side of the div with the longest content. However, if that div was later updated to have less content (and be shorter than the other div) the border would no longer go to the bottom of the page as intended.
So what was the solution?
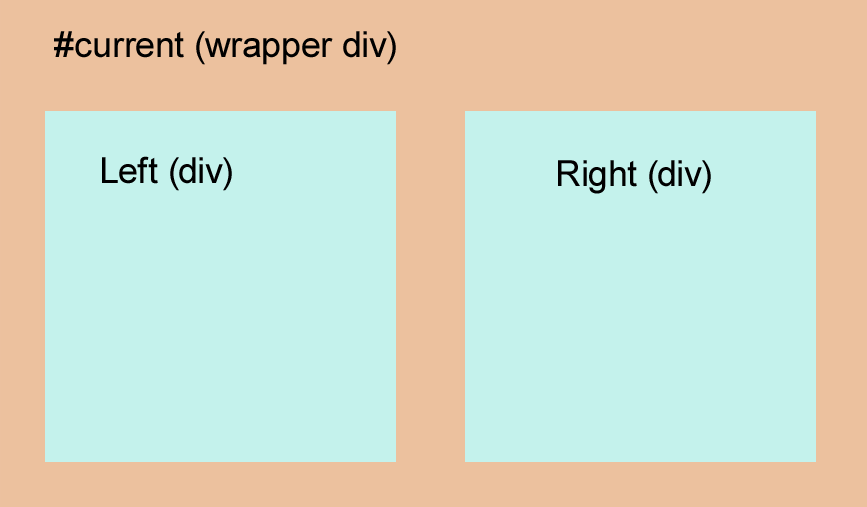
Wrap another div around the left and right column divs and add a small background image that repeated on the y axis and was positioned from the left edge between the two divs.
The css declaration for this was:
position:relative;
top:-270px;
padding-bottom:20px;
margin-bottom:-270px;
background-image: url(images/content-border-background.png);
background-repeat: repeat-y;
background-position: 639px 7px;
}
To learn more about CSS properties visit the W3C CSS Tutorial.
 0
0


