So, now that you know How to Choose a Fertilizer, you have to learn how to apply them. Just like a skincare routine, you should be intentional and informed before using any fertilizer.
Applying Fertilizers
The application of fertilizers depends on a lot of factors, type of plant, type of soil, and time of year are a few of the factors that will dictate your application process. Keep in mind that there are restrictions on the application of P fertilizer in Florida, unless your soil is phosphorous (P) deficient. In addition, during the rainy months of June – September all nitrogen (N) and P-containing fertilizers may be prohibited for environmental safety. Read Principles Of Sound Fertilizer Recommendations to gain a deeper understanding of fertilizing practices!
General Handling Guidelines
Always follow these general guidelines when handling fertilizers:
- Get your soil tested and use the results to purchase the fertilizer needed. Fertilizer shouldn’t be opened and then sit on a shelf for months – it loses its effectiveness over time.
- Check for local ordinance to be sure when fertilizers can be applied.
- Always read and follow the label directions.
- If possible, mix and load fertilizers at the place you plan to apply them. Handle and store fertilizer away from wellheads and surface water. Avoid mixing on hard surfaces like driveways.
- Do not fertilize before heavy rainfall or within 10 feet of any water body.
- Make sure to calibrate all tools prior to application. To do this, simply follow the manufacturer’s label and recommendations.
- Immediately recover and reuse any spilled fertilizer (especially on hard surfaces like a driveway) and properly dispose of any unneeded fertilizer.
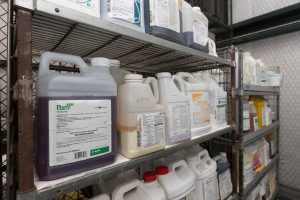
- Store and secure fertilizer in their original containers above ground. Put them in a safe place so they don’t leech into the environment when in storage.
Soil testing
Before applying fertilizers, get your soil tested. When you know what nutrients are already available to your plant, you can save time and money picking them out and applying the right source of fertilizer. Yearly sampling is good practice. You can easily and quickly (it’s very inexpensive, too!) take a soil sample using the directions and form provided by the UF/IFAS Soils Lab, where inexpensive testing is available to the public. Based on the results, choose a fertilizer that caters to the specific nutritional needs of your plants. Or, if you purchase soil, check the label to see if the soil already contains fertilizers. Go here for directions and submission details for soil tests at the UF/IFAS Soils Lab.

Timing
Applying fertilizer when the plant can use it is an important cultural practice, and one of the most critical concepts when it comes to veggie gardening. Consider the growth pattern of your plants, what are their nutrient demands throughout the year? Time your application to the growth needs of the plant, applying fertilizer outside of these demands leads to waste and water pollution. Before you put in the work and finances to choose, purchase, and apply fertilizer, make sure you know your plant needs. There are times when applying fertilizer to the soil prior to planting, like in veggie gardens, can be beneficial to the plant growth and production. Consider your placement and irrigation practices when making these decisions. Go here for specifics on garden fertilization practices.
Placement
We know that plants need a certain amount of nutrients to grow, some come from the medium you plant them in, and the rest comes from the fertilizer you choose. The goal here is to provide your plants with the right cocktail of nutrients in the right amount. There is also something to be said about where you fertilize. Remember, the roots of the plant do all the work in absorbing the nutrients. Placing the fertilizer in the root zone or is your best bet. Your plants are more likely to absorb the nutrients and you can worry less about excess washing away.
Application Techniques
When it comes to fertilizing your plants, it is important to apply them at the correct time and in the best way for your garden.
Broadcasting
Broadcasting is a method of spreading fertilizer evenly over a wide area on the soil’s surface. This technique is suitable for large gardens and landscapes that have more developed plants, or for plants with shallow roots (think peas, lettuce, and beats). Established plants have larger root systems, so this technique would be beneficial in this case.
Follow the instructions on the fertilizer label and the equipment you intend to use. For dosage, simply follow the fertilizer label recommendations. There are two types of spreaders to use: a handheld spreader or a broadcast spreader.
- A handheld spreader is ideal for small or medium gardens. It’s a great starting place for beginners.
- A broadcast spreader is designed for larger areas and is specifically designed for broadcasting. This spreader has a wheel so you can move it across a large garden for easier distribution.
Banding
Banding involves the application of fertilizer in concentrated bands along rows of plants or around individual plants to target the root zone at the start of the growing season. This technique is suitable for large gardens that seeds, younger plants, or plants that need a small amount of fertilizer.
Seeds and young plants have less roots, so this method focuses on precise placement by concentrating nutrients near the plant roots. This ensures the roots have a chance to absorb the nutrients in the fertilizer, minimizes waste, and reduces runoff.
Follow the label on the fertilizer you intend to use. A granular or liquid fertilizer is suitable. For dosage, simply follow the fertilizer label recommendations. Dig a small trench 2-3 inches to one side of the seed, at the same level, and place the fertilizer. Don’t put the fertilizer directly on the roots, so you don’t damage them.
Cover the fertilizer with soil or mulch to prevent any waste or runoff. Water the area thoroughly so the nutrients can reach the roots. Avoid overwatering, as the nutrients will move past the root systems!
Side dressing
Side-dressing is when fertilizer is applied alongside the plant rows or around the individual plants. This might sound similar to banding, but side dressing is used on plants after growth has started. Follow the recommended dosage rates on the fertilizer’s label.
Place the proper amount of fertilizer on each side of the row, about 4-8 inches away from an established plant. Side dressing is helpful for areas with sandy soils (like here in Central Florida) and rainfall that may wash nutrients from the soil, while increasing the yield of vegetables. Depending on the fertilizer and plant type, amount and timing of the application will differ. Read more here about these practices.
Top Dressing
Top dressing is a process of applying a fresh layer of nutrient-rich material (think compost or manure, not potting mix) directly onto the soils surface around your plants, like a fresh outfit. The idea is to refresh the soil around your plants with nutrients, which can help decrease the frequency of fertilizing. It also helps to maintain the structure of the soil around your plants, so they stay happy and healthy.
Remember, the concept of timing is important here too. You’ll only want to introduce a nutrient dense material when your plants need it.
Topdressing is beneficial in plants in raised beds, large containers, or pots. This technique is especially effective for crops growing in sandy low -nutrient soils like here in Central Florida (think a garden bed) and benefits crops like leaf lettuce, spinach, early cabbage, and broccoli.
Choose the nutrient rich material you want to top dress with, remove any debris from the top of the soil currently surrounding the plants. Add about 1-1.5 inches of your chosen material around the base of your plants, and gently work the new layer into the top layer of the soil below. Don’t take the material up to the base of the stems and be extra careful to keep the material from the foliage, so you don’t burn and damage your plant! Covering your new layer with mulch will help maintain soil temperature, moisture, and block those pesky weeds from growing and competing with your plants.
Tips on how to use a spreader:
Using tools and equipment in the garden makes a day of gardening that much easier. A spreader is a type of equipment that assists in the fertilization process of your garden. Follow the instructions that come with your equipment. There are several types of spreaders, but for each one it is essential that you calibrate it properly. This step is important because it will affect the rate that the fertilizer is delivered.

The best spreaders for vegetable gardening are:
Handheld Spreaders: These spreaders are small portable devices that you can carry by hand. Follow the instruction label to read how to best use them. Then turn the crank and evenly spread the fertilizer across your garden.
Broadcast spreader: This one mentioned above is a larger spreader that distributes the fertilizer in a wide arc. This type of spreader is beneficial for larger gardens. To use, follow the instructions that come with the equipment. You can adjust the speed rate to deliver the amount of fertilizer you need. Move across the garden in overlapping rows to spread the fertilizer evenly.
Calibrating Spreaders
It is important to calibrate your equipment so that you can accurately apply fertilizer without over or under-doing it.
To calibrate a spreader, figure out your desired application rate based on the fertilizer label and plant requirements. You might want to test your spreader in an area that will benefit from the fertilizer, or where the fertilizer won’t go to waste, or pollute the environment. You can measure the output by weight, how much did the spreader weigh before and after? This will help you get an idea of how much material was used.
Maintaining your equipment is crucial to preserve its longevity while keeping your gardening experience smooth and hassle free. Make sure to read the manufacture instructions on how to clean and maintain your equipment to ensure proper application of fertilizer. Too much or too little fertilizer can negatively impact your garden. A little maintenance goes a ling way in keeping your garden habits strong and your plants happy.
Using a spreader can help when fertilizing your garden and by carefully calibrating it, you can accurately apply fertilizer to promote the best growth for your plants!
Protect Yourself
Wear protective gear and clothing to avoid direct contact with the fertilizer. Wearing gloves, long sleeves, and pants are a way to shield yourself from potential skin irritation. Read the manufacture label for their recommendations and warnings. Wash your hands thoroughly after use to prevent any residues, skin irritation, and accidental ingestion. This food is only for plants!
If you need to, even wearing a mask or respirator can prevent you from inhaling fumes or granules of powder.
Another tip, make sure to check the weather before fertilizing! Choosing a calm day with little rain and wind is a good idea to save your time and money, as well as keep the environment safe! You don’t want your fertilizer to wash away or blow back on to you or elsewhere instead of your garden!
Irrigation Management
You might not consider your water management practices when thinking of fertilizer, but they are connected! Especially here in Florida with our sandy soil and heavy rainfall. Water management is one of the most important factors of proper fertilization. Not only will proper water management improve plant health, but the environment will thank you too! It is not recommended to fertilize before heavy rain or irrigation events, because all the nutrients wash away in the water. Water will leach the nutrients down through the sandy soil or cause it to runoff over the surface eventually causing it to enter and pollute water resources either above or below ground.
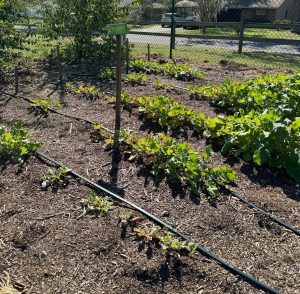
To get a uniform water application, use efficient systems like micro-irrigation sprinklers and drips. The idea is to keep the water and nutrients in the root zones long enough for the plant to absorb them. If the nutrients wash away in the water, or sink below the root zone, your plants won’t get their nutrient boost. This highlights the importance of the frequency and running time of your chosen irrigation practices.
There is something to be said for the soil moisture as well, tracking the status of your soil moisture with the water demands of your plants will maximize your water use efficiency while minimizing mineral leaching and runoff. This will save on water, which is incredibly important here in Florida where we face the potential of a water shortage. It will also save you on your utility bills! Learn how to calibrate your irrigation system here and about the use of soil moisture sensors, which use available soil moisture to either trigger or prevent irrigation from running based on plant needs.
When using fertilizer keep the materials off hard surfaces, like your driveway. If some does happen to get on your driveway, or any other hard surface, make sure to clean it and dispose of it. These leftovers will wash away into storm drains and leech into bodies of water and groundwater.
Summary
Alright, now you’re equipped with the know-how to apply fertilizer like a pro! Just remember to match your fertilizer choice with your plant’s needs, time it right, and handle it with care. With these tips, your garden will be flourishing in no time.
Consider the four major fertilization factors (the 4R’s): right rate, right source, right placement, right timing. Supplying nutrients to your plants with these ideas in mind will optimize their growth and keep your wallet happy too. Click here to read more about the 4R’s.
Read more about fertilizers in our Fertilizer Fundamentals series:
- Fertilizer Fundamentals: How to Choose the Right One – UF/IFAS Extension Pasco County (ufl.edu)
- Fertilizer Fundamentals: The Best Time to Fertilize – UF/IFAS Extension Pasco County (ufl.edu)
Have a question?
If you have any questions about gardening in Central Florida, please contact the UF/IFAS Extension Pasco County at 352-518-0156. For more information on UF/IFAS Extension Pasco County Community Gardens, and how you can join one, visit http://sfyl.ifas.ufl.edu/pasco/.
Follow us!
We have several ways to connect. Visit our Facebook, Instagram, Eventbrite, Blogs, Florida-Friendly Facebook, Website
Supervising agent: Dr. Whitney Elmore
More resources from UF/IFAS Extension Pasco County:
- UF/IFAS Extension Pasco County
- UF/IFAS Extension Pasco County Community Gardens
- Dr. Whitney Elmore’s Podcast: Rooted in Florida
More from UF/IFAS Gardening Solutions:
- The Basics of Fertilizer
- Compost
- Fertilizing Your Florida Lawn
- Organic Soil Amendments: Compost, Manure, and More
- Palm Nutrition
- Pesticide and Fertilizer Disposal
- Right Fertilizer, Right Place
- Trash Talk: Alternatives to Traditional Composting
- Types of Fertilizer
- Vegetable Gardening in Florida: Applying Fertilizer
- Vegetable Gardening in Florida: Selecting a Fertilizer
 1
1
