DIY Beeswax Food Wraps
Did you know…each time you wash your face, brush your teeth, or do laundry, you just might be adding microscopic bits of plastics into the aquatic environment. These tiny particles are called microplastics. They are less than 5 mm (0.2 inch) in diameter or length. Microplastics come from a variety of sources. One major source is from larger plastic debris that breaks down into smaller and smaller pieces over time.
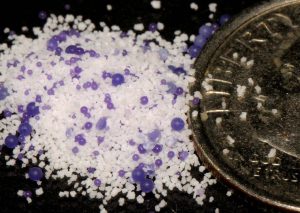
The other major source is microbeads (Figure 1). They are very tiny pieces of manufactured plastic that are added to health and beauty products, such as some cleansers and toothpastes. These tiny particles easily pass through water filtration systems and end up in water. In addition, the fleeces you love to wear are also contributing to the plastics in our waters.
Synthetic fibers shed with every washing
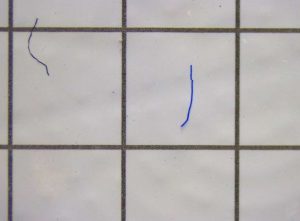
Today’s sportswear often has synthetic fibers to create stretchy, breathable clothing, but more of these fibers shed off with every wash (Figure 2). In water, toxins tend to stick to the surface of these plastics. They might be million times more concentrated on the plastics than in the water. Aquatic animals eat these microplastics and think they are food. Because microplastics are small enough, they can be consumed by filter-feeders, and eventually clog an animal’s digestive system, leading to starvation.
There are different ways to get involved and help raise awareness about microplastics in our waters and help keep them clean. The simplest way is to reduce your plastic waste. Avoid using plastic drinking straws, use reusable shopping bags instead of single-use plastic ones, and choose more natural fabrics rather than microfiber or other synthetic fabrics. Or you can try to make your own beeswax food wraps.
What You Need
- Pre-washed cotton material piece: It can be pre-used materials such as sheets or T-shirts. 100% cotton thin materials usually work better.
- Pinky shears: Use them to cut fabric squares, as they help materials keep from unraveling
- Beeswax beads or pellets: About 1/4 cup of beeswax for every 10 inch square piece of fabric
- Parchment paper: You can reuse them as you iron
- Iron and ironing board or cutting board, or other flat surface that can withstand heat
How to Do It
- Tape or place one piece of parchment paper to the ironing board.
- Place your cloth on the parchment paper.
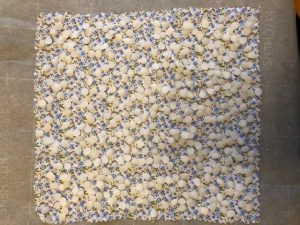
- Sprinkle beeswax pellets on the cloth. (Figure 3)
- Make sure it is evenly spread and the edges are covered.
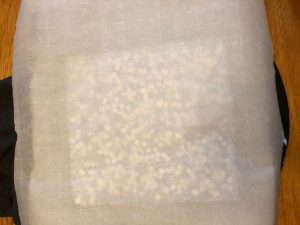
- Cover your cloth and beeswax with a second piece of parchment paper. (Figure 4)
- Iron gently over the top of the parchment paper.
- Set iron on cotton setting;
- Make sure that wax is melted into all areas;
- It is better to have too much wax than not enough. If there is not enough wax, liquids will pass through the cloth. If there is too much wax, use an extra cloth to soak up some excess wax. Lay a second piece of cloth on top and then parchment paper. Iron gently until the original cloth has a nice amount of wax.
- Remove the parchment paper.
- Wait a few moments for the cloth to cool enough to touch.
- Gently remove the cloth and let it cool.
How to Use It
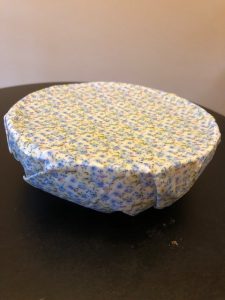
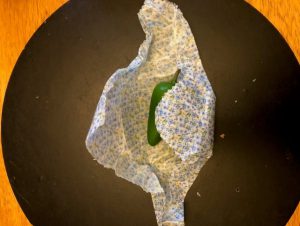
- Use it as cling wrap or Ziploc bag alternative. (Figures 5 and Figure 6)
- It makes the cotton water-tight.
- Use the heat of your hands to shape and secure it.
- Beeswax melts at 62 °C to 64 °C (144 °F to 147 °F). Heating softened the wax and makes it easier to mold and easier to stick to itself.
How to Maintain It
- Wash with cold water with mild soap.
- Add small amount of wax and re-iron when your wrap loses wax.
- These wraps are made only of cotton cloth and beeswax. They will not be sticky like commercial beeswax wraps, which also contain tree resin and plant oil. These beeswax-only wraps will also acquire folds and creases over time. They may develop areas of “low-wax”. You can add wax and re-iron to refresh the wraps at any time.
 2
2
