Most youth today are too young to remember what a “Shrinky Dink” is. However, it is a fun activity that children of all ages can still enjoy today. For those of you that are unfamiliar with what a “Shrinky Dink” is, it is a plastic sheet with characters or drawings on it that kids would color, cut out, and then bake. While baking, the plastic shapes would magically shrink down to a tiny size, leaving kids in amazement. The truth is that there is not magic, but rather science that causes the plastic to shrink down to 1/3 of its size.
You see the plastic sheets used to make “Shrinky Dinks” are polystyrene. Polystyrene is the same as #6 recycled plastic and is often used to make the clear to go containers you might see in restaurants or at the grocery stores. Once you place polystyrene in the oven it crinkles up on itself (almost looking like it is going to stick together) and then starts to lay flat again. When it is finished baking the object is left 1/3 of its original size, is about 10 times thicker and inflexible. The entire transformation process only takes about 30 seconds to three and a half minutes depending on the size of your object.
Want to try your hand at making your own “Shrinky Dinks”? You can do so using some basic supplies.
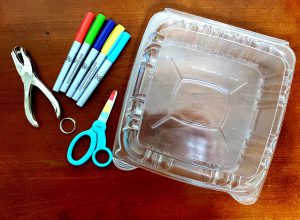
Supplies:
Clean #6 Plastic
Permanent Markers
Scissors
Aluminum Foil
Oven and Tongs or Oven Mitts
Stencil or Print Out of your Favorite Graphics or Characters (Optional)
Directions:
1. Obtain a piece of #6 plastic (polystyrene) container.
2. Cut any excess plastic away to make a flat sheet, using both the top and bottom.
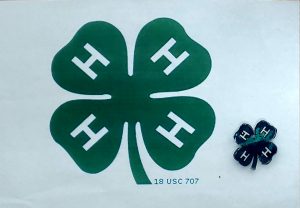
3. Draw, trace, or write your desired image or text on your plastic sheet using permanent markers.
4. Pre-heat your oven to 350° and place a rack in the lowest position.
5. Cover a baking sheet with foil or make a baking tray straight out of the aluminum foil to place your objects on.
6. Place your object in the tray, with the ink facing up.
6. Use the tongs or an oven mitt to place the tray on the bottom rack.
7. Allow objects to bake no longer than 3 1/2 minutes.
8. Using the tongs or oven mitt, remove the tray.
9. The first few seconds, the objects will be very pliable and extremely hot. You may flatten the object more if needed using the tongs.
10. Allow objects to fully cool and then enjoy your finished product.
*If you wish to use your “Shrink Dink” as a key chain, you will want to place a large hole in the object prior to putting it in the oven.
 0
0
