Jun Soo Bae, UF/IFAS FMEL
Co-Author: Yoosook Lee, UF/IFAS FMEL
Introduction
Have you ever had an unwelcome guest appearing out of nowhere that induced rage from the depth of your soul? Perhaps you’re relaxing on the porch or watching TV in the safety of your home when the next thing you know, you hear an annoying buzz and are left with an itching welt. Well, there is a way to exact your revenge the “Darth Vader” way through “carbonization” to display your victory proudly.
Mosquitoes are annoying critters that contribute more to human deaths and illnesses more than any other animals. Invasive mosquito species can also pose a significant threat to the health of people and animals, so, it is important to keep up with surveillance and continued education. This can be done in many ways, but the most accessible is through insect preservation.
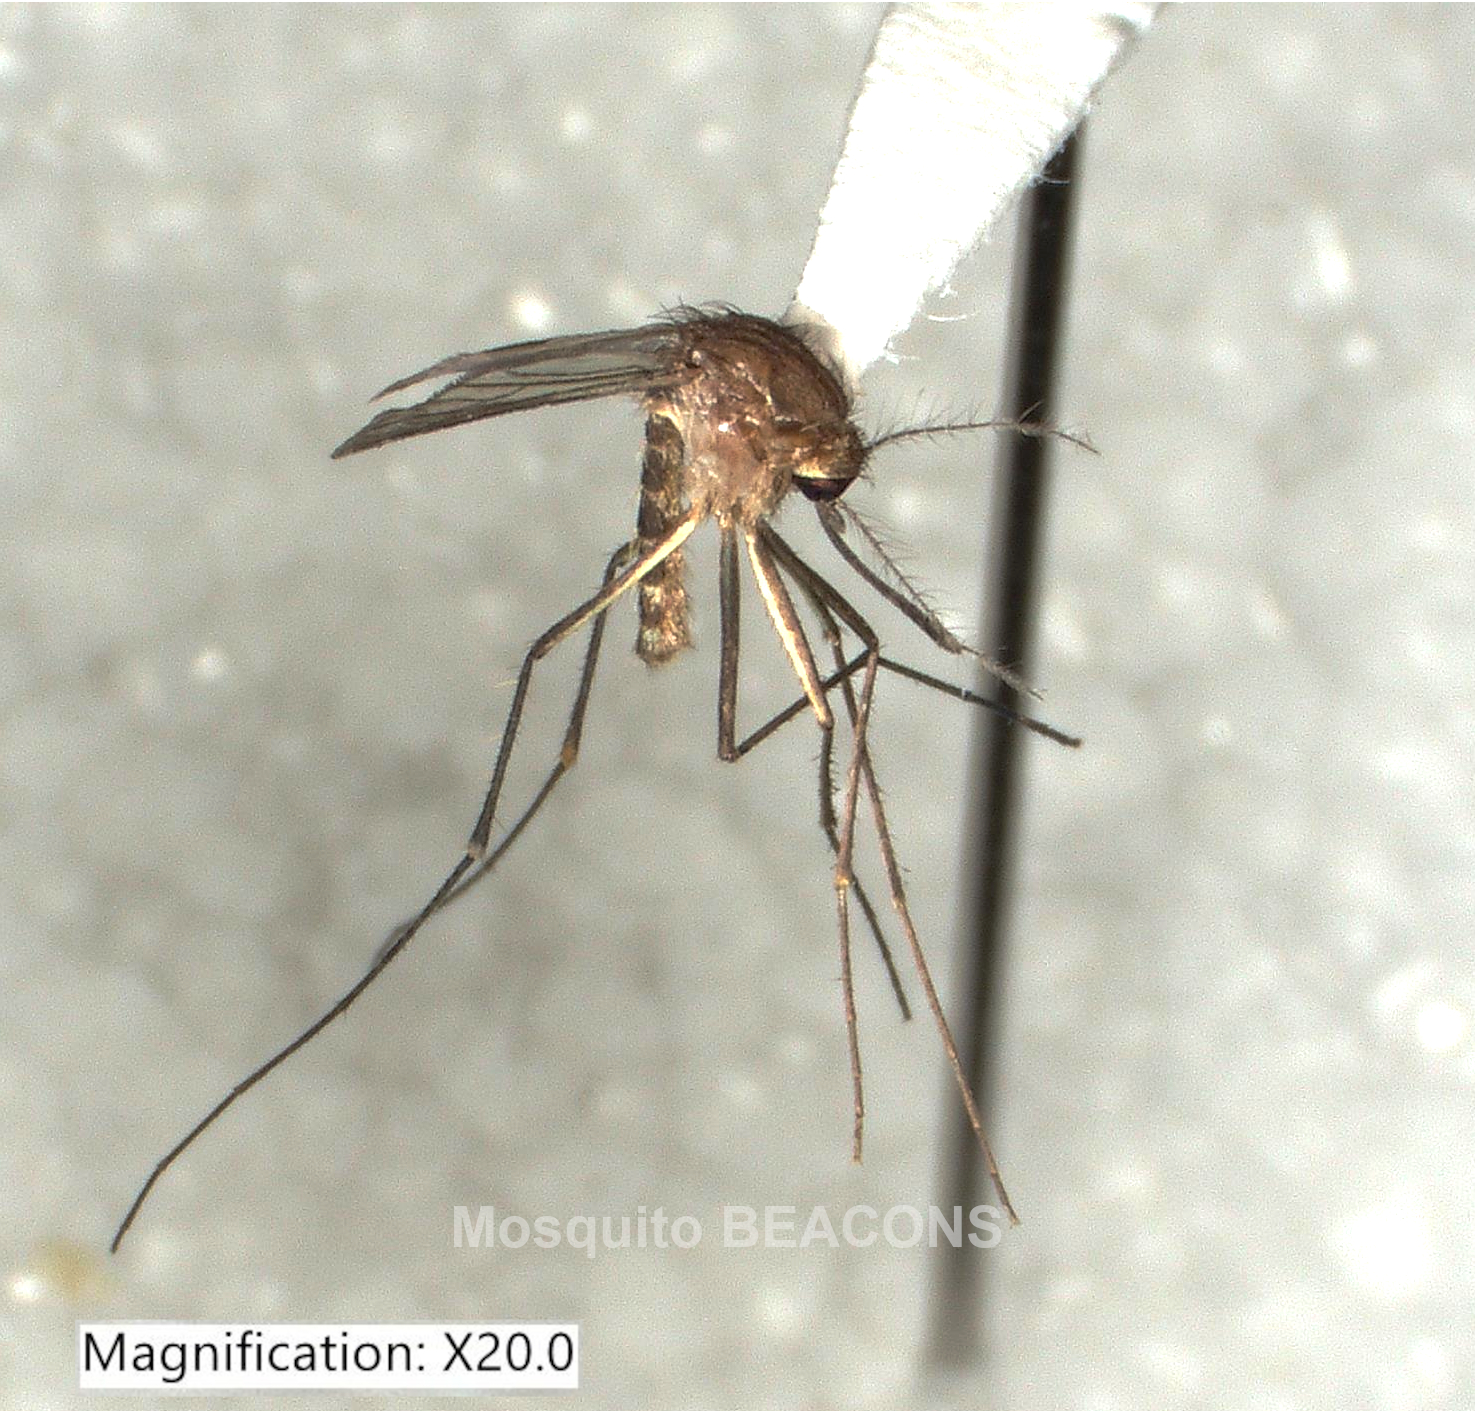
There are tons of different insect preservation methods available, pinning and drying being the most popular. However, it can be intimidating and frustrating for beginners and new hobbyists. Pinning requires various equipment and fine motor skills to position insects. Moreover, pinning tiny insects, like mosquitoes, often requires a pin-point mount (Figure 2) which can be painstaking and involves a sticky mess. Small insects also become very fragile and brittle once they dry, making positioning quite difficult. Using hand sanitizer can be a great solution.
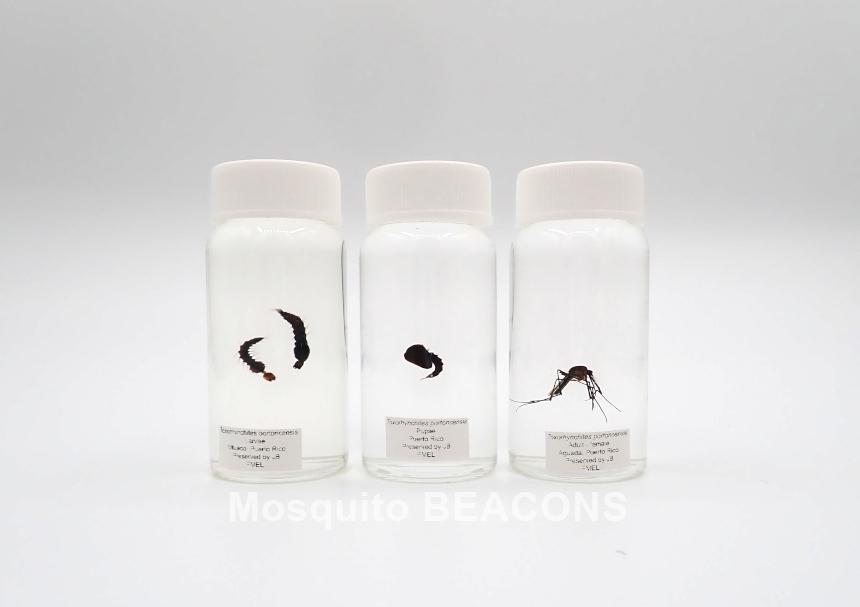
Hand sanitizer can be a convinient medium to display critters with soft bodies (caterpillar, termites, larvae, pupae, etc.) or hard exoskeletons (beetles, wasps, ants, etc.). Alcohol based gel like hand sanitizer can preserve your specimen while holding the position that you desire. Here, I will discuss the methods of preserving the adult exoskeleton of mosquitoes, as well as their soft-bodied immature stages.
Catching mosquitoes of all life stages
Mosquitoes are easier to collect than you think. Entomologists use oviposition traps to catch and assess possible invasive mosquitoes in an area. It works by attracting gravid (pregnant) female mosquito into a water-filled container. The entrance to the trap acts like a funnel that narrows down in the center, preventing mosquitoes from flying back out. Once the female fly into the trap, it lays eggs on a paper strip that is lined against the inner wall of the container. The rougher surface of the lined paper helps the mosquito stay in position while laying eggs compared to smooth plastic or glass.

The eggs look like little oval dots close together (Figure 5). One can recreate this trap by cutting the top half of a bottle to create a bottle neck, trapping most of the gravid female mosquitoes that flies in.
To make an oviposition trap:
- Grab a bottle (soda bottle, juice bottle etc.), a strip of paper (or paper towel), and a black plastic bag (Figure 6 A).
- Cut the top 1/3 of the bottle (Figure 6 B).
- Fill the bottom half with 1-2 inch of water (Figure 6 C).
- Line the inner wall with a strip of paper towel (Figure 6 D).
- Put the top half of the bottle upside down into the remaining bottom (Figure 6 E).
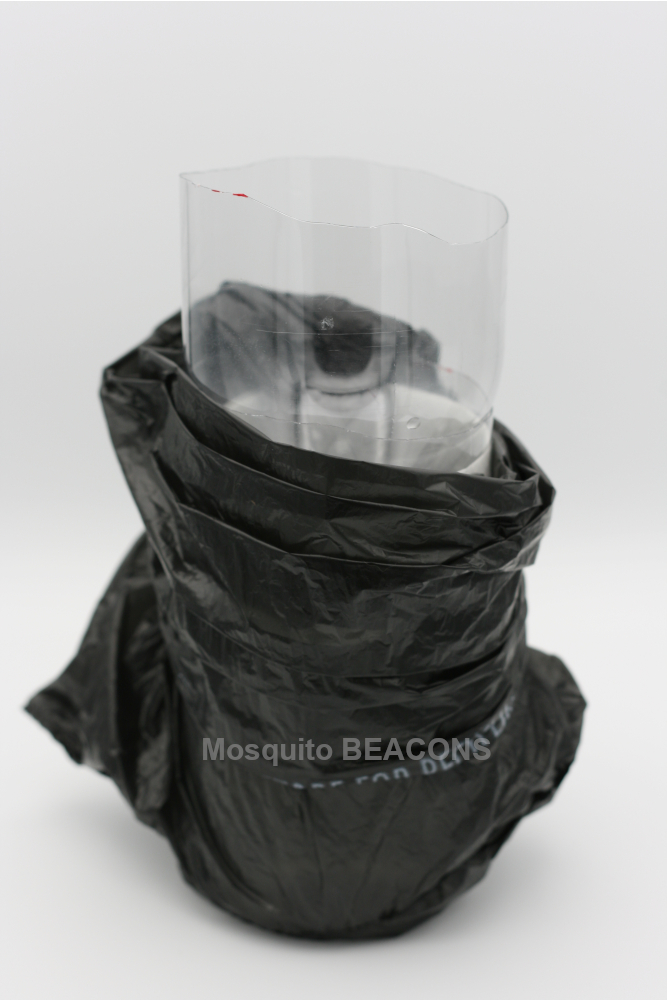
- Next, tape the black plastic bag around the outside wall of the bottom of the bottle (mosquitoes like a dark area to lay eggs) (Figure 6 F).
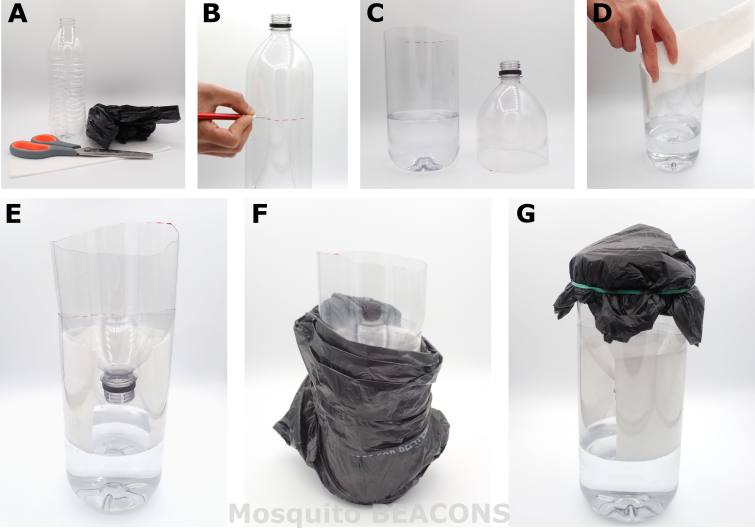
Place this oviposition cup in your backyard and check it every day. Ensure that you do not lift the “bottleneck” as you may free surviving mosquitoes. Instead, take a peek by removing the taped black plastic bag and assess if you have caught any mosquitoes or if there are any eggs on the strip of paper towel. If you see eggs on the paper towel, you can cover the top with saran wrap/plastic with a couple of small holes and let the eggs hatch into larvae (Figure 6 G). You can collect different instars of larvae as you watch them grow. Mosquitoes have 4 instars. You can collect a couple of larvae at a time until the last couple of immature mosquitoes develop into a pupae, so you have all the life stages of the mosquito. Just remember to place them in the freezer to euthanize and preserve the body of the larvae and pupae. Leave any specimens in the freezer for at least 24 hours.
Things you need for insect preservation
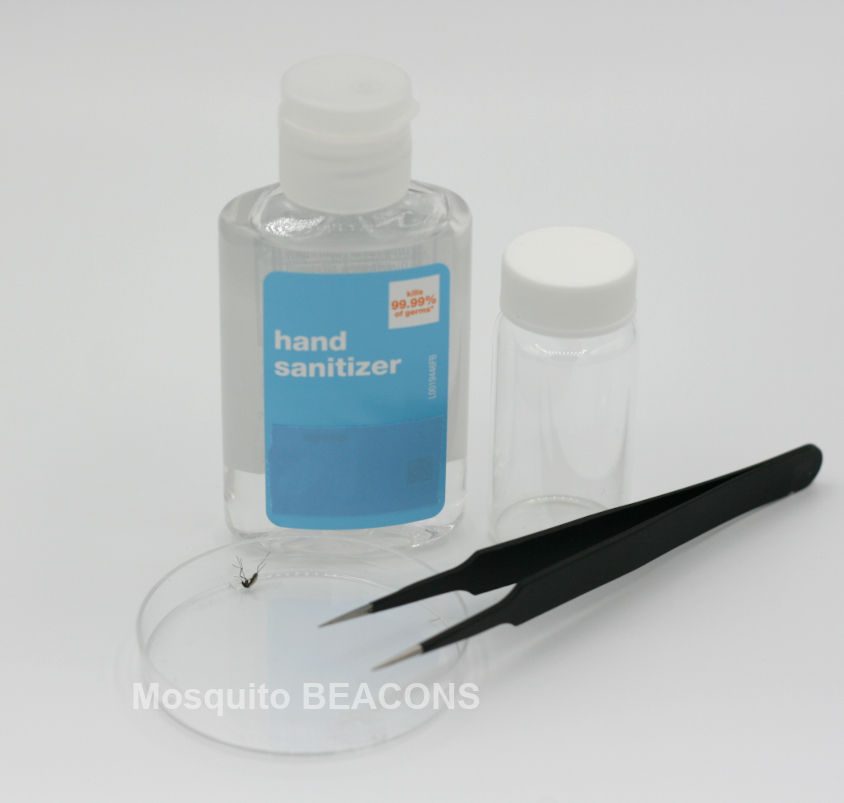
Acquire the following items (Figure 3):
- Hand sanitizer
- Glass jar/vial with lid
- Forceps/Tweezers
- Insect (preferably small; in this case mosquitoes)
- Patience (unable to capture in Figure 3)
Any alcohol-based hand sanitizer will work. I recommend using a glass jar for the integrity of the container. Additionally, it will provide the clearest view of your specimen. You can use any forceps that can position your specimen in the jar without getting your hands covered with hand sanitizer. I recommend sticking to small insects as they will have a lower moisture content. Moisture can create white clouds around the specimen as it leaks bodily fluids when submerged in hand sanitizer. Most of all, stay calm, collected, and be patient. Wonderful work comes with great care and patience.
Making your jar of adult mosquitoes
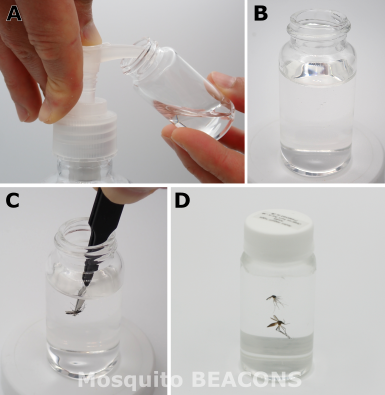
- First, fill a jar with hand sanitizer to the neck of the container (Figure 7 A). You want to leave enough room so that the hand sanitizer will not overflow when you dip the specimen and forceps into the jar (Figure 7 B). Ensure that you are either pouring or pumping the gel slowly to avoid air bubbles. Don’t worry If you get air bubbles as they are inevitable. If you get air bubbles, you can either place the jar on a flat surface with the lid closed for a couple of days for the bubbles to float out or gently tap it on the table to shake the bubbles out. Ensuring that there are no bubbles will give your specimen a clear, resin-like look.
- Once you have filled the jar, grab your forceps and gently place the insect into the hand sanitizer. Limbs of small insects can be quite delicate, so take your time and gently bring it down to avoid breaking off the legs (Figure 7 C).
- Once you have it at the desired depth, you are free to position the insect to your liking. Again, take your time and be gentle.
- If you are satisfied with your positioning, fill up the jar to the brim. This will prevent air pockets from forming when you close the lid. If air pockets are present, the specimen could be displaced when the jar is sideways or upside-down as the air pocket can form an air bubble and move around the jar (Figure 7 D).
Making your jar of larval and pupal stage of mosquitoes
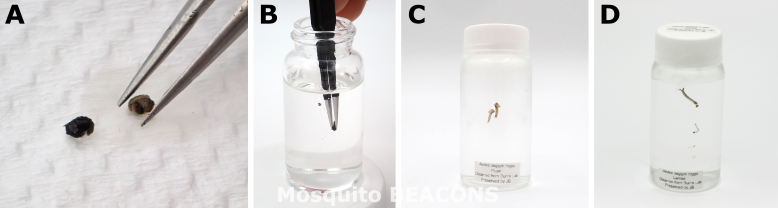
- Fill the jar as instructed in step 1 above (Figure 7 A).
- Please dab the larvae/pupae sample dry after thawing by placing them on a clean paper towel before submerging the into the hand sanitizer (Figure 8 A). You can also lay them on a baking sheet and pour boiling water over them for better preservation. Too much water in the body tissue can cause “clouding” later when water escapes and create a bubble between the hand sanitizer and mosquito body.
- Once the larvae and pupae are dry, using forceps, grab them by the tail to prevent their anatomy from coming apart (Figure 8 B).
- Grab the tail and pull down to the required depth. You can even position the four instars as in the figure below to relay the development of the larvae (Figure 8 C and D).
- If you are satisfied with your positioning, fill up the jar to the brim.
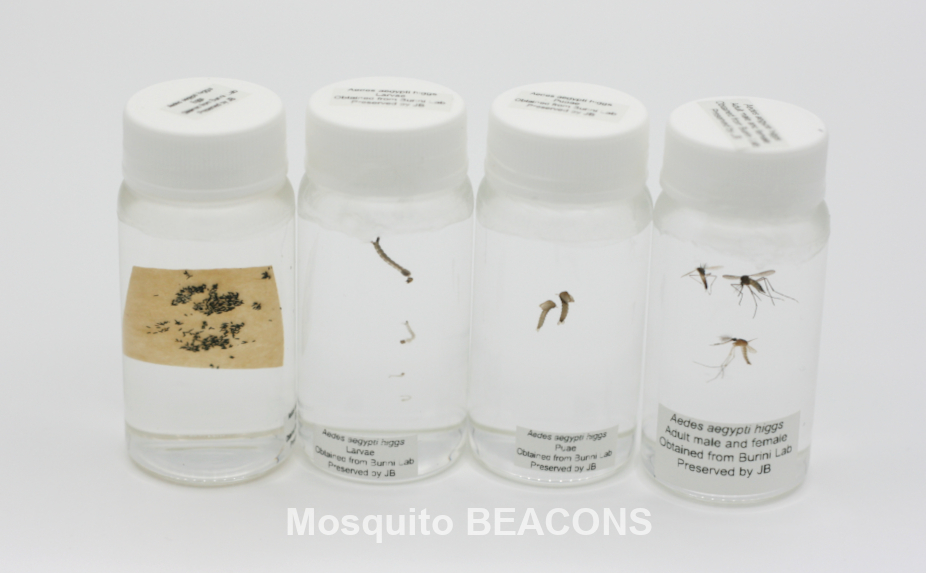
And there you have it! A trophy jar of your unsolicited guest (Figure 9). You can also use this technique to preserve other insects.
Acknowledgement
Special thank you to the Burini lab (Dr. Bianca Burini, Mathieu Zamy, Michael Futo) for providing the mosquitoes samples. Also, thank you to the Puerto Rico Vector Control Unit (Dr. Garyson Brown, Lianmarie Soto Jiménez) for the assistance in mosquito collection. We would also like to thank Telmah Telmaderrehei and IRREC for access to the digital microscope.
Financial Disclosure Statement
We acknowledge funding support from the United States Department of Agriculture (USDA) National Institute of Food and Agriculture (NIFA) Multistate Hatch project (7007941), National Institute of Health award to (R35GM156217), the Southern Integrated Pest Management Center (Project S24-050) as part of USDA NIFA Crop Protection and Pest Management (CPPM) Regional Coordination Program (Agreement No. 2022-70006-38002), and the Gulf South VECTOR sponsored by the Center for Disease Control and Prevention. The funders had no role in product design, data collection, decision to publish, or preparation of this blog.
 7
7
