Many beachfront homeowners and municipalities are in the process of restoring dunes that were heavily damaged by Hurricanes Matthew and Irma. This process is regulated and permitted by Florida’s Department of Environmental Protection. Once sand has been placed, it is important to stabilize that sand by planting dune plants. Sea oats (Uniola paniculata) play a major role in stabilizing and building dunes. Sea oats are protected by law. Plants may not be collected and transplanted; rather, seedlings must be obtained from licensed growers. It takes about 64 seedlings to plant an area of dune that is 10’ x 10’ in area. Best planting times in north Florida are between April and October. Much of this time coincides with sea turtle nesting season. Precautions may need to be taken so as not to disturb these nests. Planting sea oats (or any dune plants) is labor- and time-intensive!
Below are some guidelines for planting sea oats. Once established, sea oats plants will spread vegetatively as well as by producing seed. The “liners” that are typically planted are relatively vulnerable during their first few months. To maximize success of the planted seedlings, people should not walk over the young plants!
Some tips for planting sea oats

- Obtain sea oats plants that come from seed from your part of the state (if possible). Gulf coast and east coast sea oats are genetically different. They may not survive as well if planted on the “wrong” coast.
- Several growers in Florida can supply sea oats, but many will not sell to individual homeowners (they only sell wholesale). Most are in the southwest part of the state, or in the panhandle.
- Sea oats are typically sold as liners/plugs, although 4” and larger pots may be available.
- Sea oats need to be planted so that at least 4-6” of the vegetation is buried in sand. This requires creating a hole that is about 8-12 inches deep (but it does not need to be very large in diameter). Because sand blows around so much, if the plants are not planted deep enough, their roots may become exposed and they will not survive.

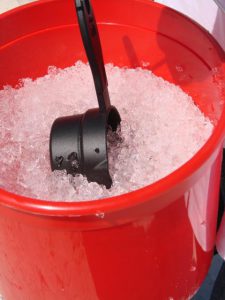
Hydrated water-absorbing polymer ready to be added to the hole for the sea oats plant. - Sea oats require watering once or twice a week during their first few months. One way to accomplish this is to add about a cup of water absorbing polymer (hydrated) to each hole before adding the plant. The plant will be able to draw water from this gel. Rainfall will re-hydrate the gel so it will continue to keep the plant watered for some time.
- Most recommendations are to sprinkle one teaspoon of time-release fertilizer around the base of each plant. Work the fertilizer into the sand with the spoon or your fingers.
- Individual sea oats should be planted 18” apart, with rows of plants staggered. It is best to start at the top of the dunes and work your way down to the base of the dune.
Click here to read a document explaining how to use straw to help fertilize sea oats that have been planted to restore dunes.
 0
0

