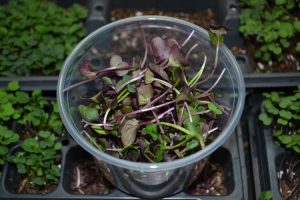
Are you a patient gardener? If not, try you hand at growing microgreens. Why wait for at least a month or so for a harvest when you can enjoy fresh greens in as little as 7 days.
Microgreens are the tender seedlings of your favorite vegetable or herb. They are grown in containers or flats and harvested when the first seed leaves are fully emerged. You may also wait until you see the first true leaf. Unlike sprouts, microgreens require light and are cut when harvesting to only include the stem and leaves. Depending on the seeds you start, you may enjoy mild or spicy greens, or refreshing lemony flavors of a young herb.

Here are the basic steps to get started growing microgreens.
- Get a commercial tray or recycled container and sterilize it in a 10% bleach solution. Make sure your recycled containers have drainage holes.
- Choose a good seed starting potting mix that is more fine textured. Many seeds you will start are small and a mix with a lot of bark may affect seedling germination. Add one to 1.5 inches of the soil in your container. You don’t need more depth of soil since you will be harvesting in a week to 20 days.
- Decide which types of greens you like. Consider arugula, radish, mizuna, or mustard for some spice. Swiss chard and purple cabbage will give you color, while collards, broccoli, and kale will offer mild flavors. Don’t forget about herbs like dill, cilantro, or basil for good flavors too.
- Once you have chosen your seed, beginners should seed one selection per container. As you learn the growth rate of your favorite selection, you may can combine different varieties in a flat.
- Make sure your soil is moistened (but not soaking) and spread seed on top of the soil. You will be adding about 12 seeds per square inch of soil for small seeds and about 7 seeds per square inch for larger seeds.
- Sprinkle vermiculite over the seeds and then use a spray bottle or nozzle mister to moisten the vermiculite.

Vermiculite allows moisture to get to seeds and may reduce seedling disease pressures. Photo by Beth Bolles, UF IFAS Extension Escambia County - Place containers in a greenhouse, window sill, or indoor growing tray. As soon as the seeds germinate, make sure they are receiving bright light. If growing indoors, the fluorescent or plant lights need to be a few inches above seedlings. Move the lights higher as your seedlings grow.

New seedlings need bright light. Indoor lights that are 2-3 inches from seedlings prevent thin, spindly stems. Photo by Beth Bolles, UF IFAS Extension Escambia County - Maintain a room temperature of about 70 degrees F. Temperatures above 75 degrees F can lead to disease issues
- It is also best to water from the bottom to prevent disease issues. If this is not possible, carefully water seedlings so not to injure delicate plants.
- Radish and kale will be ready for harvest in about 7 days. Swiss chard, basils, and cilantro may take 20 days.

Microgreens are ready to harvest. Photo by Beth Bolles, UF IFAS Extension Escambia County - Use clean scissors to cut stems, careful not to pull up any soil. Remaining soil and roots can be composted.
- When you are ready to use in a salad, sandwich or in juicing, place microgreens in a bowl of water to wash. Let them air dry on a paper towel.
The good news about growing microgreens, is if you find they are not to your liking or too much trouble, it has only been a couple of weeks of effort.
 0
0


